File storage is one of the most important parts of a self-hosted infrastructure. Applications can be redeployed, containers can be rebuilt, and virtual machines (VMs) can be recreated, but the data itself needs a reliable home. Backups, media libraries, project files, VM disks, office documents, surveillance recordings, and application data all need storage that is predictable, recoverable, and easy to manage.
TrueNAS Community Edition is an open source network-attached storage (NAS) operating system for users who want to build and operate their own storage server. It combines a web-based management interface with OpenZFS, file sharing services, snapshots, replication, apps, containers, and VMs. For homelab users, small teams, startups, and DevOps-minded organizations, TrueNAS provides a way to turn dedicated hardware into a central storage platform without buying a proprietary NAS appliance.
Project Information
Name: TrueNAS Community Edition
URL: https://www.truenas.com/truenas-community-edition-features/
License: Open core, with open source components including LGPLv3 and GPLv3 parts
Documentation: https://www.truenas.com/docs/
Based on: Linux and OpenZFS
Current Stable Documentation Line: TrueNAS 25.10
Latest Early Release Line: TrueNAS 26 Beta
Commercial Version: TrueNAS Enterprise
Storage First, Services Second
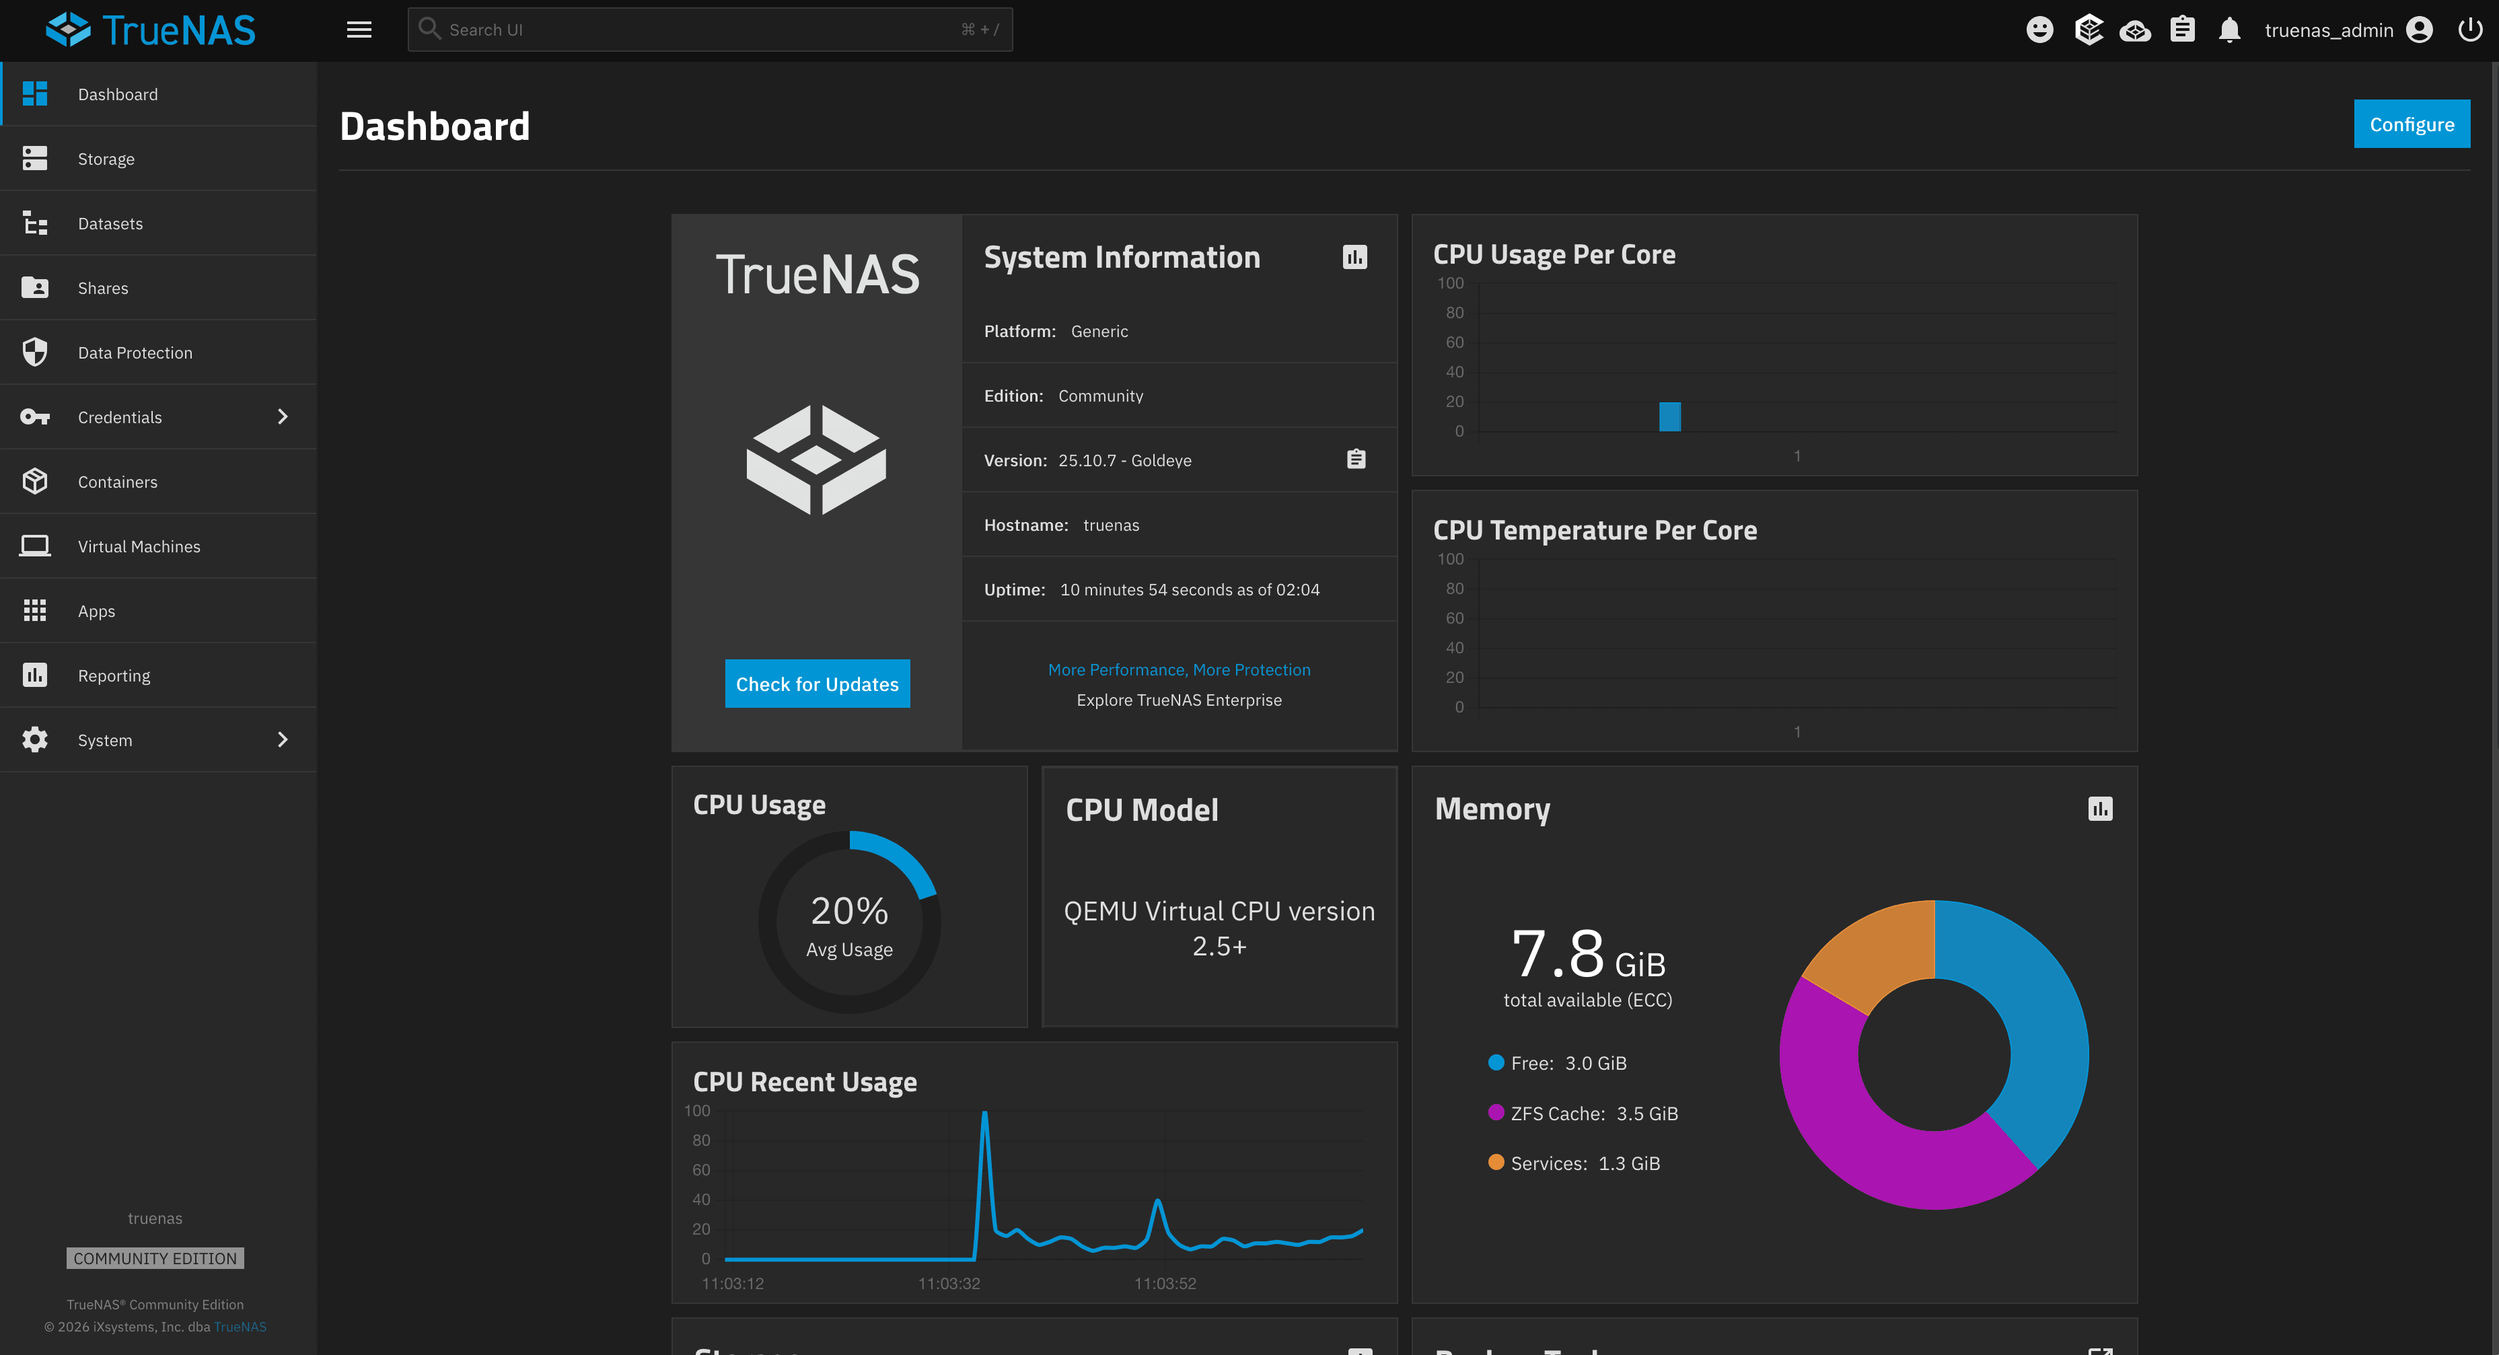
TrueNAS is best understood as a storage operating system. Its main job is to manage disks, pools, datasets, shares, snapshots, and replication. The web interface makes these complicated-sounding tasks accessible but still allows more experienced users to understand what's happening under the hood.
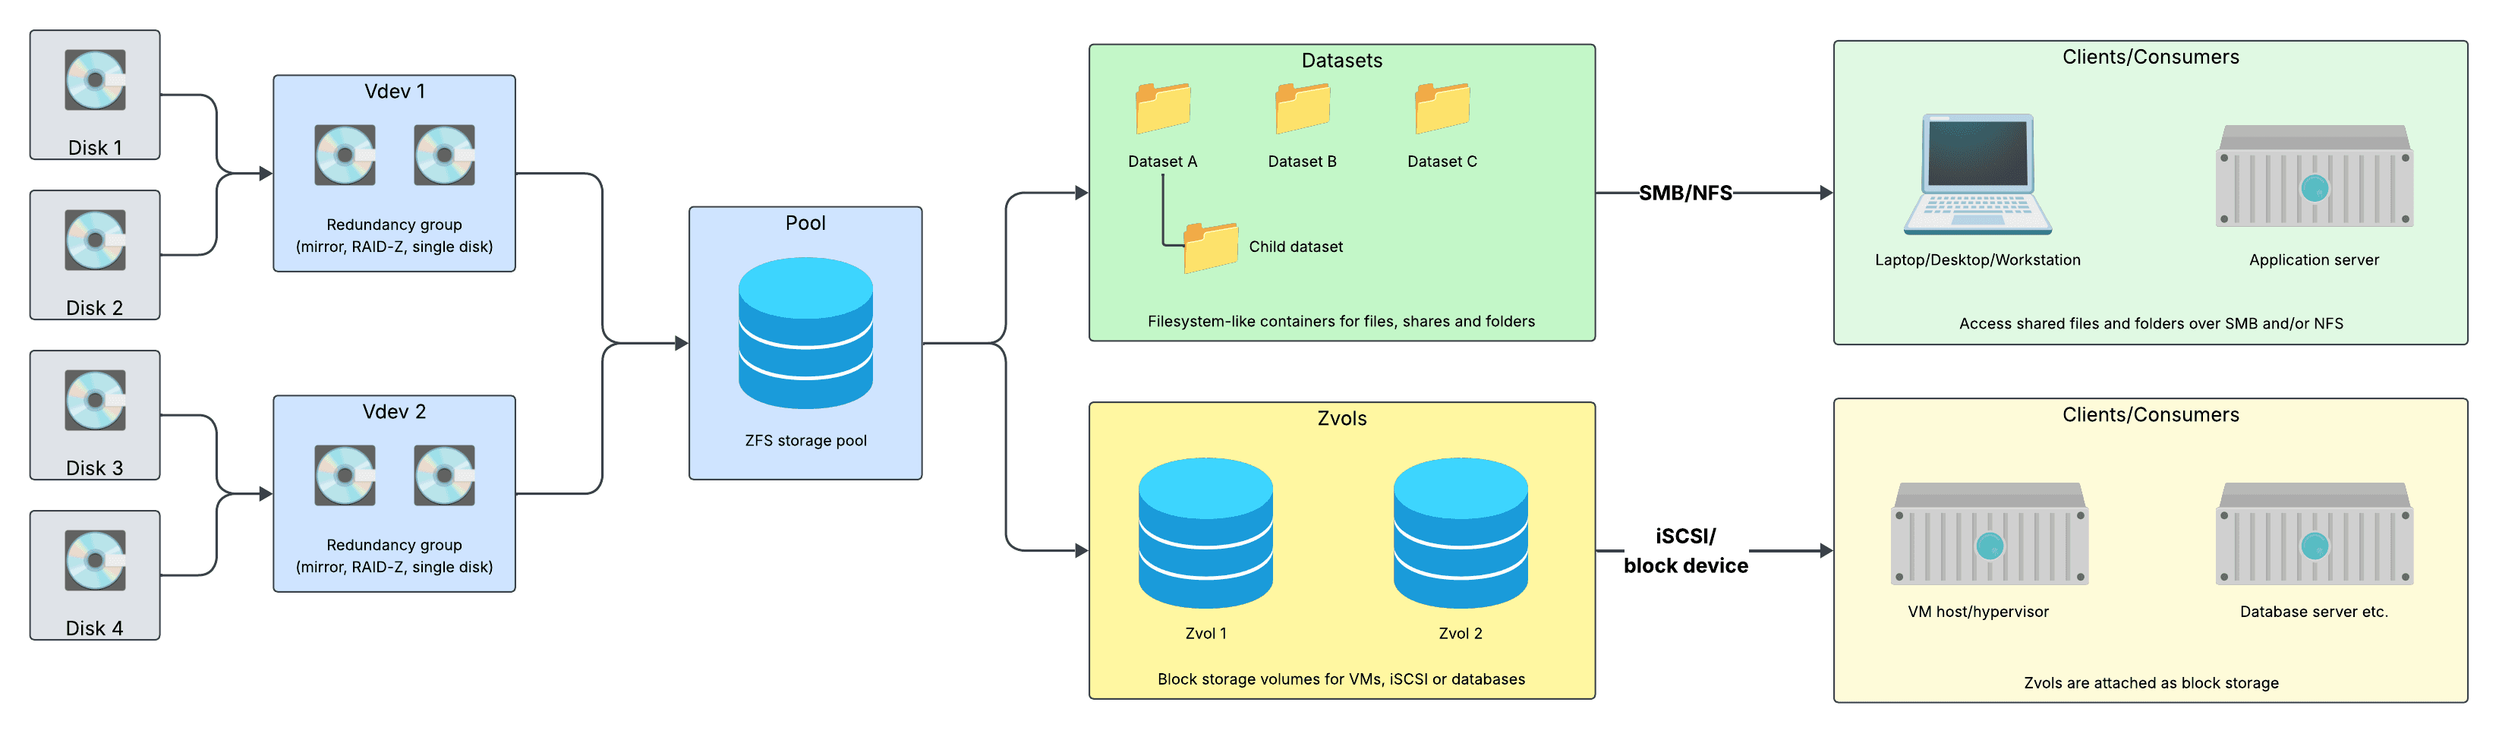
The foundation is ZFS, a filesystem and volume manager. In TrueNAS, disks are grouped into pools, and data is organized into datasets or ZFS volumes (zvols). Datasets are useful for file storage, shares, backups, and application data. Zvols provide block storage, for example, for Internet Small Computer System Interface (iSCSI) or VM disks. ZFS brings features such as checksumming, snapshots, compression, replication, scrubs, and RAID-Z layouts.
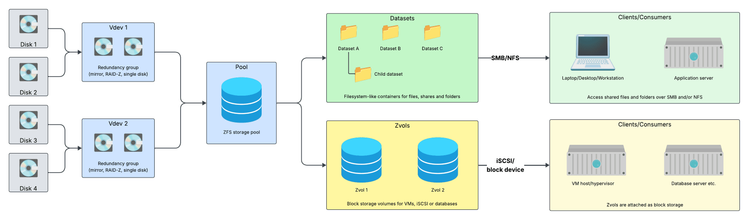
For self-hosters, one of the main reasons to choose TrueNAS over a simple Linux server with shared folders is that TrueNAS gives structure to storage administration. Instead of manually combining filesystems, cronjobs, Samba configuration, and backup scripts, you manage most storage tasks through one interface.
This does not mean TrueNAS removes the need to understand storage design, though. Pool layout, disk choice, redundancy, RAM, network speed, and backup strategy still matter because a badly designed storage server can still lose data. TrueNAS helps manage storage, but it cannot make poor hardware choices or missing backups safe.
File, Block, and Object Access
TrueNAS exposes storage in several ways: For most users, SMB shares are the default choice for Windows, macOS, and general office-style file access. NFS is useful for Linux clients, virtualization hosts, and server workloads. iSCSI can provide block storage to hypervisors or systems that need a remote disk-like device.
This flexibility makes TrueNAS suitable for mixed environments. A homelab might use SMB for family files, NFS for Linux servers, and iSCSI for a virtualization cluster. A small business might use separate datasets for departments, project archives, backups, and application storage.
Permissions are an area where planning pays off. Server Message Block (SMB) and Network File System (NFS) access models are different, and mixing them carelessly can create confusing ownership and permission behavior. Before creating dozens of shares, administrators should define users, groups, datasets, access-control lists (ACLs), and access patterns clearly.
Snapshots, Replication, and Backups
Snapshots are one of TrueNAS's most valuable features. A snapshot captures the state of a dataset at a point in time without immediately duplicating all data. This makes snapshots useful for recovering from accidental deletion, bad application updates, ransomware damage, or unwanted file changes.
TrueNAS allows scheduled snapshots and replication tasks. Replication can send snapshots to another TrueNAS system or another compatible ZFS target. This is especially useful for self-hosters who want a second NAS at another location, a backup server in a different building, or a disaster recovery copy of important datasets.
However, snapshots are not the same as backups. If the whole storage server is stolen, destroyed, encrypted, or misconfigured, local snapshots may not help. A serious TrueNAS setup should include off-system backups. For important data, that usually means a second machine, removable media, cloud storage, or another location.
The practical rule is simple: Use snapshots for fast recovery and backups for disaster recovery. TrueNAS makes both workflows easier, but the administrator still has to design and test the recovery process. The widely-used 3-2-1 backup rule also applies to TrueNAS deployments: Maintain 3 copies of your data, use 2 different types of media for storage and keep at least 1 copy off-site.
Hardware Choices Matter
TrueNAS can be installed on commodity x86 hardware, but storage servers are sensitive to hardware quality. The official hardware guide warns against unsupported or unsuitable storage devices and discourages problematic drive types such as certain shingled magnetic recording (SMR) drives. In a self-hosted NAS, poor disk choices can create rebuild problems, timeouts, or unreliable behavior under load.
A good TrueNAS system should start with hardware sized for its actual workload. TrueNAS recommends at least 8 GB of RAM for a basic system with up to eight drives, which is sufficient for a small NAS serving files over SMB or NFS. For a new build, however, 16 GB is a more comfortable starting point, while systems serving virtual-machine storage over iSCSI should generally use at least 16 GB and preferably 32 GB or more. Additional applications, virtual machines, directory services, and large numbers of clients also increase memory requirements. ECC memory is recommended where the CPU and motherboard support it because it can detect and correct memory errors before corrupted data is written to storage, although TrueNAS can also operate with conventional non-ECC RAM. For the storage pool, use CMR hard drives designed for NAS or enterprise workloads, such as WD Red Plus/Pro, Seagate IronWolf/Pro, or comparable enterprise disks, and avoid SMR drives because their write behavior can cause poor performance and problems during ZFS resilvering. SSDs or NVMe drives are also suitable when higher IOPS or lower latency are required. TrueNAS itself should be installed on a separate boot device rather than on one of the data-pool disks. A small SATA SSD or M.2 SSD is ideal; the current minimum is around 20 GB, although inexpensive 120 GB or larger SSDs are often easier to source. USB flash drives should be avoided because TrueNAS performs regular writes to its boot pool and USB sticks tend to have much poorer endurance and reliability.
Virtualizing TrueNAS is possible, but it should be done carefully. TrueNAS needs direct and reliable access to disks. Passing through a host bus adapter (HBA) or controller is usually safer than presenting virtual disks from another storage layer. For most self-hosters, installing TrueNAS directly on physical hardware is the simpler and more predictable choice.
Storage expansion also needs planning. ZFS pool layouts are not as flexible as adding random disks to a consumer NAS. Newer TrueNAS and OpenZFS versions are improving expansion options, but administrators should still design pools around expected growth, redundancy, and replacement cycles.
Apps, Containers, and VMs
TrueNAS Community Edition can run applications, containers, and VMs. This is attractive for users who want one box for storage plus services such as media servers, backup tools, dashboards, or lightweight internal applications.
This convenience has limits in that every app or VM consumes CPU, memory, disk I/O, and administrative attention. Memory used by containers or VMs is memory that cannot be used for ZFS caching. A storage server that also runs many applications can become harder to troubleshoot when performance problems appear.
For small environments, running selected apps on TrueNAS can be very practical. For larger or more critical setups, it may be better to treat TrueNAS as the storage layer and run applications on separate virtualization or container hosts. That separation keeps the NAS focused on protecting and serving data.
Deployment and Operations
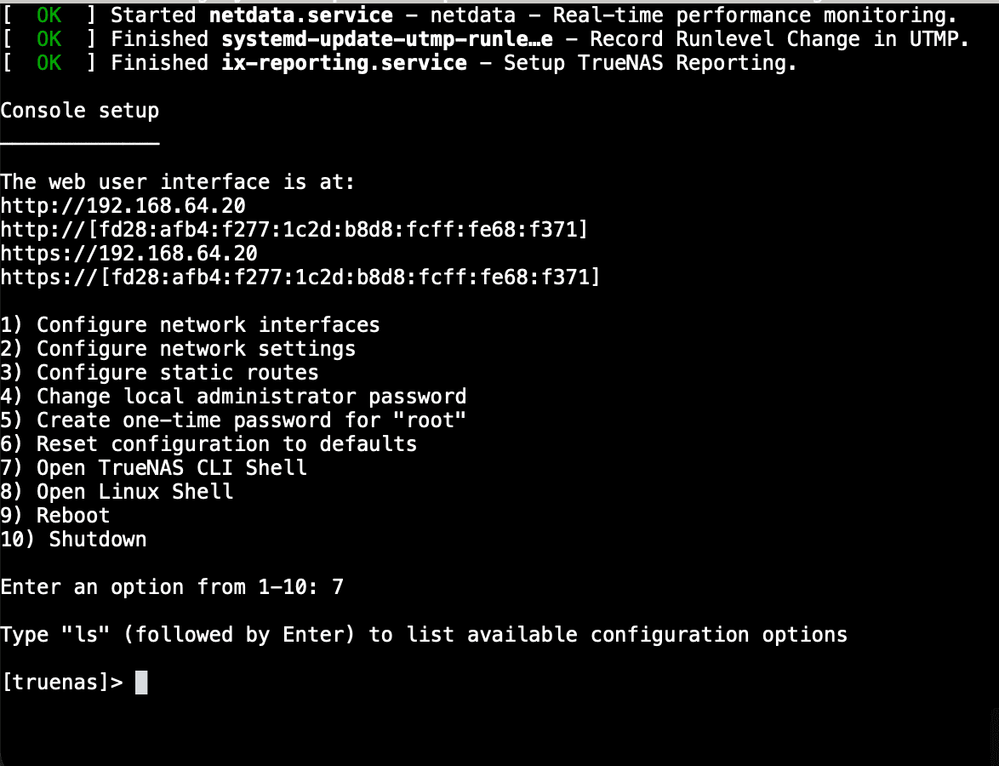
Installing TrueNAS is straightforward: Download the installer/ISO image, install it on a boot device, connect to the web or the terminal interface, create a pool, configure datasets, and publish shares.
Afterwards, administrators should configure alerts, email notifications, update windows, SMART tests, scrubs, snapshots, replication, and backups early. They should also export and store the TrueNAS configuration file after major changes. This file can be critical when rebuilding a system after a boot device failure.
Security also needs attention: TrueNAS should not be exposed directly to the public Internet. Remote access should use a VPN or another controlled access method. User accounts, permissions, API keys, apps, and sharing services should be reviewed regularly.
Review & Outlook
TrueNAS Community Edition is one of the strongest options for self-hosted storage. Its biggest strengths are OpenZFS, a mature web interface, snapshots, replication, broad sharing protocols, and the ability to run on standard hardware. It gives self-hosters many of the tools normally associated with professional NAS systems.
Its main tradeoffs are hardware sensitivity, ZFS planning requirements, operational responsibility, and the temptation to run too many services on the storage server itself. TrueNAS is powerful, but it rewards users who plan carefully.
All in all, TrueNAS Community Edition is a very good fit for homelabs, small offices, media storage, backup targets, and self-hosted infrastructure that needs reliable shared storage. For users willing to understand ZFS basics and take backups seriously, it can become the central storage foundation for an entire self-hosted environment.


Sovereignty starts with hosting it yourself
Minimize risks. Control costs. Maximize data protection.